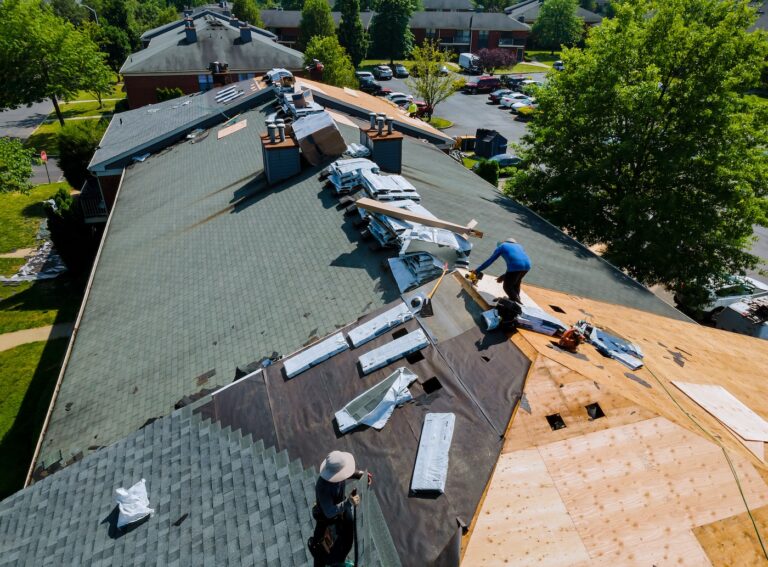
How to Install Ridge Cap Shingles (Full 7-Step Guide)
Ridge cap shingles are a vital component of a fully functional and long-lasting roofing system. Not only do they provide a finished look to your roof, but they also play a significant role in protecting your home from leaks and moisture damage. If you’re a homeowner looking to understand the process of installing ridge cap shingles, you’re in the right place!
Here’s what we’ll cover:
- Proper tools and materials: The essentials every homeowner or roofer needs for a seamless installation.
- 7 simple steps: A detailed, step-by-step guide to ensure your shingles are installed correctly.
- Why it matters: How ridge cap shingles contribute to roof performance and longevity.
Now, let’s explore the tools, techniques, and best practices that go into installing ridge cap shingles.
🤔 What Are Ridge Cap Shingles?
Ridge cap shingles play an essential role in the overall structure and protection of a roof. These specialized shingles are specifically designed to cover the ridge or peak where two sides of the roof meet. By providing an additional layer of coverage, they not only enhance the roof’s durability but also contribute to its visual appeal, creating a polished and professional finished appearance that complements the rest of the roofing system.

The Functions
- Added durability: Ridge cap shingles are built to protect the roof’s most vulnerable areas, particularly the joints along the ridge, which are exposed to the harshest elements. This additional layer helps shield these areas from weather-related wear and tear, including strong winds, heavy rains, and even snow, ensuring the roof remains intact and functional over time.
- Prevent moisture intrusion: One of the primary functions of ridge cap shingles is to prevent water from seeping into the roof’s ridge. By covering this critical area completely, they create a strong barrier against moisture and leaks, which could otherwise lead to costly damage over time, such as mold or rot within the roof structure.
- Aesthetic finish: Beyond their practical benefits, ridge cap shingles also contribute to the overall appearance of the roof. They provide a clean, tidy, and streamlined look that improves the home’s curb appeal. This polished finish not only adds value to the property but also ensures the roof looks cohesive and professionally constructed.
Ridge cap shingles are a small yet vital component of a well-built roof, offering a combination of protection, functionality, and style.
Why You Shouldn’t Skip Ridge Cap Shingles
Skipping ridge cap shingles isn’t an option if you care about the overall functionality and appearance of your roof. Without proper ridge coverage, roofs are more susceptible to moisture intrusion, structural damage, and early wear.
🛠️ Preparing for Installation
Before getting started, make sure you have all the required tools and materials ready. Here’s your checklist:
- Ridge cap shingles: Select shingles that match the material and style of your roof.
- Roofing nails: Ensure they’re appropriate in size and material.
- Hammer or nail gun: Use for securing shingles.
- Roof adhesive: Provides added reinforcement.
- Protective gear: Includes gloves, safety harness, and non-slip shoes.
- Measuring tape and chalk line: For proper alignment and spacing.
- Utility knife or shingle cutter: To trim shingles for a perfect fit.
✅ 7 Steps to Installing Ridge Cap Shingles
Follow these seven simple steps to install ridge cap shingles effectively:

1. Measure and Prepare the Ridge
Begin by measuring the entire length of the ridge. This is an important step to determine the exact number of shingles you’ll need for the project. Take your time to ensure accuracy, as miscalculations can lead to delays or material shortages. Once measured, snap a chalk line along the ridge to use as a guide. This chalk line will help ensure the shingles are placed in a straight, even line, which is crucial for both aesthetics and functionality.
2. Cut and Arrange Ridge Cap Shingles
If you’re using standard shingles for the ridge, you’ll need to cut them into thirds to create ridge cap pieces. Use a utility knife or roofing scissors for clean, precise cuts. Once cut, arrange these ridge cap pieces along the ridge without nailing them down yet. This allows you to check the alignment and make any necessary adjustments before securing them permanently. Ensuring proper alignment at this stage will save you time and effort later.
3. Install Underlayment
For added protection against water and moisture, apply roofing underlayment over the ridge if it hasn’t already been installed. This extra layer acts as a barrier, preventing moisture from seeping beneath the shingles and causing damage to the roof structure. Make sure the underlayment is aligned properly and secured firmly to avoid shifting during installation. This step is particularly important in areas prone to heavy rainfall or snow.
4. Place the Starter Shingle
Start at one end of the ridge and position your first ridge cap shingle. Be sure the shingle extends slightly over the edge of the roof to provide proper coverage and protection. This starter shingle sets the tone for the rest of the ridge cap installation, so take care to place it correctly and ensure it’s aligned with the chalk line. Proper placement here will make it easier to maintain consistency as you work your way across the ridge.
5. Secure with Nails
Using roofing nails, secure the ridge cap shingles to the roof. Drive two nails into each side of the shingle to hold it firmly in place. Position the nails approximately one inch away from the edge to ensure a secure fit and prevent the shingle from lifting in strong winds. Make sure the nails are hammered in at a consistent depth to avoid damaging the shingle or compromising its effectiveness.
6. Overlap Each Shingle
Lay the next ridge cap shingle so that it overlaps the previous one by about 5-6 inches. This overlap is critical for creating a watertight seal and ensuring that the ridge is fully protected from the elements. Continue this overlapping pattern along the entire length of the ridge, making sure each piece is aligned with the chalk line. Take your time to check the alignment as you go to maintain a uniform appearance.
7. Seal the Final Piece
When you reach the end of the ridge, you’ll likely need to cut the final shingle to fit the remaining space. Use a utility knife to trim the shingle to the correct size, ensuring it fits snugly without leaving any gaps. To secure the final piece, apply a small amount of roofing adhesive underneath to help it stay in place, especially in areas that experience high winds or harsh weather conditions. Press the shingle firmly into position, and double-check that it’s aligned with the rest of the ridge cap. This final step completes the installation and ensures your ridge is well-protected.
⭐️ Pro Tips for Success
Ensure Proper Nail Placement
- Pressure balance: Avoid overdriving nails, which can damage shingles.
- Spacing: Keep nails evenly spaced for maximum security and a polished look.
Work Safely
- Secure footing: Always wear non-slip shoes and use a harness when working on steep roofs.
- Avoid strong winds: Schedule installation for calm, clear days to ensure efficiency and safety.

💪 Benefits of Installing Ridge Cap Shingles Correctly
- Leak prevention: Properly installed ridge cap shingles form a robust shield against leaks.
- Extended roof lifespan: Reduce the risks of premature wear and tear caused by exposure.
- Polished appearance: Ridge caps deliver an elegant, finished look for curb appeal.
- Seamless integration: Blend perfectly with the rest of the roof for a uniform design.
⭐️ Why Choose Embry’s Roofing for Your Roofing Needs
At Embry’s Roofing, we understand how vital ridge cap shingles are to the overall health and performance of your roof.
Whether you need assistance with a full roof installation or repairing your ridge cap shingles, Embry’s Roofing is here to help. Contact us today for expert advice, inspections, or your next project.
Your roof’s protection starts at the top. Contact Embry’s Roofing now to ensure your home is ready for Indiana’s next weather challenge!
CHECK OUT THE LATEST
FROM OUR BLOG