

What Is a Commercial Roof Punch List? (And Why It Protects Your Investment)
The final days of a roofing project are when small oversights quietly turn into expensive problems, and most property owners sign off without a structured way to catch them. A commercial roof punch list is the documented checklist of remaining corrections that must be finished before a project is truly complete. Partnering with an experienced roofing contractor who treats this step seriously protects your warranty, your budget, and your building. This guide explains how the process works and what to expect.
Here’s what this guide covers:
- Why a punch list protects your investment after the crew leaves
- The 6 steps of a thorough roof punch list process
- The most common items that appear on a commercial roof punch list
- How to tell minor cleanup items from serious deficiencies
Why a Punch List Matters to Building Owners Before You Sign Off
Once a roofing project is signed off and final payment is released, your leverage to get remaining issues corrected drops dramatically. A punch list keeps the contractor accountable for finishing the job properly, and it gives you a written record of exactly what was agreed upon. For a building that depends on a watertight roof to protect inventory, equipment, and tenants, that accountability is far more than a formality. Building owners who skip this step often discover problems only after the warranty window has started running.
- Protects Your Warranty Coverage. Manufacturer warranties often require that installation details meet specific standards, and unresolved punch list items can give a manufacturer grounds to deny a future claim.
- Catches Problems While They’re Cheap to Fix. A missed sealant joint or loose fastener costs very little to correct at closeout, but the same issue can lead to a leak and interior damage within a single season.
- Creates a Clear Paper Trail. A written punch list documents what was deficient, who was responsible for fixing it, and when it was resolved, which matters if a dispute ever comes up.
- Strengthens Your Negotiating Position. Holding back final payment until punch list items are completed gives property owners practical leverage that disappears once the last check is cut.
- Confirms the Work Matches the Contract. The punch list compares the finished roof against the agreed scope, materials, and specifications, rather than relying on a casual visual impression.
Property owners in Louisville and surrounding areas often tell us they didn’t know a formal closeout walkthrough was something they could request, which is exactly why understanding the process before a project begins makes such a difference.
6 Steps of a Thorough Roof Punch List Process for Commercial Properties
A good punch list isn’t a quick glance at the roof before shaking hands. It follows a deliberate sequence that makes sure nothing slips through the cracks, and each step builds on the one before it. Skipping any stage tends to leave gaps that only show up after the crew has left the property. The process works the same way across commercial properties of every size.
1. Substantial Completion Walkthrough and Commercial Roof Inspection
The process begins when the contractor declares the project substantially complete, meaning the roof is functional but minor items may remain unfinished. This milestone matters because it often triggers payment terms and warranty start dates, so it shouldn’t be accepted casually. A thorough commercial roof inspection at this stage sets the baseline for everything that follows.
- The property owner or their representative, the contractor, and sometimes the manufacturer’s rep should walk the roof together
- This is the right time to compare the finished work against the original proposal and specifications line by line
2. Documenting Deficiencies on a Roof Inspection Checklist
Every issue noticed during the walkthrough needs to be recorded in writing, ideally with photos and specific locations on the roof. A shared document or marked-up roof plan keeps everyone working from the same information and prevents disagreements about what was actually found. Using a standardized roof inspection checklist keeps the review consistent from one section of the roof to the next.
- Vague notes like “fix flashing near vent” are far less useful than a labeled photo with a roof section reference
- Documentation should note the nature of each issue so it can be prioritized appropriately later
3. Prioritizing and Assigning Items
Not every item carries the same urgency, so the list should be organized by severity and assigned to the responsible party. Clear ownership of each item prevents the common situation where everyone assumes someone else is handling a particular correction.
- Items that affect waterproofing, such as open seams or unsealed penetrations, should be addressed first
- Cosmetic or cleanup items can be scheduled after critical corrections, but should still have a firm deadline
4. Completing Corrective Work, From Roof Drains to Seams
The contractor then completes each listed item, ideally within an agreed timeframe documented in the contract. Property owners should expect regular updates during this stage rather than silence until the contractor announces everything is finished. Roof drains, seams, and flashing details deserve special attention here, since they are the areas most likely to be rushed.
- A reasonable deadline prevents the list from lingering open for months while the contractor moves on to other projects
- Corrective work should follow the same manufacturer specifications as the original installation
5. Re-Inspection and Verification, Including Interior Checks
After corrections are made, the roof should be inspected again to confirm each item was actually resolved, not just marked complete. Interior checks, such as looking at ceiling tiles and top-floor walls for fresh staining, round out the verification.
- Photos taken after each correction make it easy to compare against the original documentation
- Any items that weren’t properly resolved should be added back to the list for another round of correction
6. Final Sign-Off and Closeout Documentation for Commercial Buildings
Once every item is verified, the project is formally closed out with written acceptance from the property owner. This formal handover is standard practice for commercial buildings, where lenders, tenants, and insurers may all ask for closeout records.
- Final payment should be tied to this sign-off rather than released at substantial completion, since that timing is what keeps the contractor motivated to finish every remaining item
- Closeout paperwork, including warranty documents and as-built records, should be delivered at this stage
What Goes on a Commercial Roof Inspection Checklist and Punch List
Every project is a little different, but certain items show up again and again on closeout walkthroughs. Knowing what to look for makes the walkthrough far more productive, especially if you’re walking the roof with a contractor who is eager to wrap up quickly. Treat the list as a commercial roof inspectionchecklist tailored to your specific project.
- Flashing and Sealant Gaps. Incomplete or inconsistent sealant at edges, penetrations, and transitions is one of the most common punch list items, and one of the most likely to cause leaks later.
- Membrane Damage or Seam Issues. Small punctures, wrinkles, or poorly bonded seams created during installation need to be repaired before the roof is considered finished.
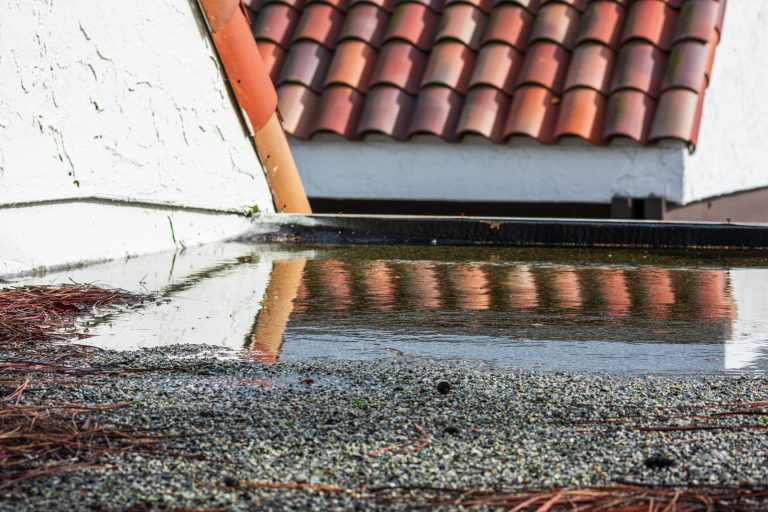
- Drainage Concerns. Drains, scuppers, and gutters should be clear and properly sealed, with no standing water or debris left behind from construction.
- Loose Fasteners or Penetration Details. Exposed or backing-out fasteners and improperly sealed pipe or conduit penetrations can create leak paths if they aren’t corrected.
- Debris and Site Cleanup. Leftover materials, scrap, and fasteners on the roof or around the building perimeter can damage the new roof and create safety hazards.
- Missing Documentation. Warranty paperwork, product data, and inspection records are part of the finished deliverable and belong on the list if they haven’t been provided.
Property owners in Louisville and surrounding areas who walk the roof with these categories in mind consistently catch more issues than those relying on a quick visual impression from the ground. Bringing a printed checklist and a camera to the walkthrough makes the process faster and far more thorough.
Minor Items vs Serious Deficiencies, Including Ponding Water
Not everything on a punch list deserves the same level of concern, and understanding the difference helps you decide what can wait and what must be corrected immediately. The table below groups typical items by severity so you can prioritize with confidence during your own walkthrough.
| Item Type | Example | Typical Resolution Timeline | Risk If Ignored |
| Cosmetic | Scuffed edge metal, paint touch-up | Within a few weeks | Minimal, mostly appearance |
| Cleanup | Leftover debris, scrap material | Before final sign-off | Possible membrane damage or safety hazard |
| Functional | Loose fasteners, incomplete sealant | Within days | Leaks and premature wear |
| Critical | Open seams, unsealed penetrations | Immediately | Active water intrusion and warranty risk |
The most important rule is that anything affecting waterproofing should never be treated as a low priority item, regardless of how small it looks. Property owners in Louisville and surrounding areas should insist that critical and functional items be fully resolved and verified before final payment is released, since those are the issues that turn into leaks during the first heavy rain after a project wraps up. Persistent ponding water, for example, should be documented and addressed rather than dismissed as normal.
Close Out Your Roofing Project With Confidence Through Roof Inspections
A punch list may feel like a formality at the end of a long project, but it’s one of the most valuable and underused tools a property owner has for protecting a major investment. Taking the time to walk the roof, document every deficiency, and verify each correction before signing off prevents the kind of hidden problems that don’t show up until the contractor is long gone. Scheduling regular roof inspections after closeout keeps the roof protected for the long term.
At Embry’s Roofing, we build a thorough closeout process into every commercial project, working with property owners across Louisville and surrounding areas to make sure the finished roof matches what was promised. If you’re planning a roofing project or want a second set of eyes on a recent installation, contact us today to schedule an inspection.
CHECK OUT THE LATEST
FROM OUR BLOG