How To Put A Tarp On A Roof Without Nails? (7 Steps)
When strong winds or torrential rains damage your roof, a tarp can be the first line of defense to protect your property from the elements. But, what if you don’t want to use nails that could damage the underlying structure further? Thankfully, it’s possible to secure a tarp without nails, and this method works whether you’re a homeowner or a commercial property manager. This guide provides everything you need to know about how to put a tarp on a roof without nails, including:
- Why use a tarp for temporary roof protection?
- Materials you’ll need
- Step-by-step guide to securing a tarp without nails
- Tips for a successful installation
🤔 Why Use a Tarp for Temporary Roof Protection?

Using a tarp for temporary roof protection is crucial for safeguarding both commercial and residential properties from water damage, debris, and further structural issues after a storm or during repairs. It provides a cost-effective, quick solution to prevent costly damage while longer-term fixes are planned.
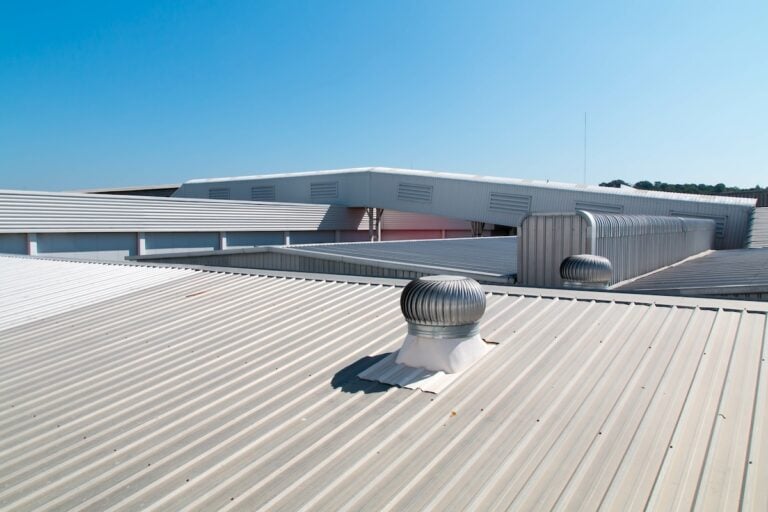
Commercial Roof
In a commercial setting, the need to use tarps on a roof can arise from various situations. Whether it’s due to severe weather damage, ongoing roof repairs, or maintenance work, tarps serve as a reliable and cost-effective solution. By promptly covering damaged areas on a commercial roof, business owners can protect valuable equipment, inventory, and sensitive documents from water damage or exposure. This ensures business continuity and minimizes potential disruptions caused by leaks or further deterioration.
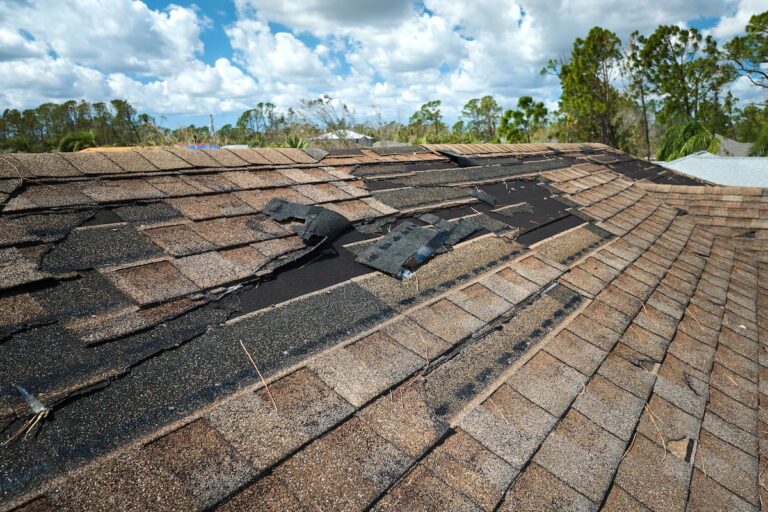
Residential Roof
Similarly, homeowners may face situations where tarps become essential for the protection of their residential roofs. Storm damage, fallen branches, or temporary roof leaks can all necessitate the use of tarps. By promptly covering these vulnerable areas, homeowners can prevent water intrusion, which can cause extensive damage to the interior of their homes. Using tarps provides temporary relief and peace of mind until permanent repairs can be made, ensuring the safety of personal belongings and the structural integrity of the house.
Whether it’s a commercial or residential roof, the versatility and effectiveness of tarps make them an invaluable tool in safeguarding property and minimizing potential long-term damage caused by leaks or exposure.
🛠️ 7 Step Guide to Securing a Tarp Without Nails

Follow these detailed steps to safely secure a tarp onto your roof without using nails, protecting your home while minimizing further damage to your roof structure.
Materials You’ll Need
Before you begin, ensure you have these materials readily available:
- A heavy-duty tarp (choose one large enough to cover the damaged area)
- Rope or bungee cords
- Sandbags or other weighted objects
- Ladder
- Work gloves
- Safety goggles
- A helper (for both safety and ease)
Having these on hand will make the process smoother and safer.
1. Inspect the Damage
Start by carefully assessing the extent of the roof damage. Walk around the property to spot visible issues, such as missing shingles, holes, or sagging areas. Look for signs of potential leaks, like water stains in your attic or ceilings. Always ensure safe working conditions—avoid climbing onto the roof during heavy rain, strong winds, or icy conditions, as this can pose serious safety risks. If possible, use binoculars or a drone for a closer look, so you can identify the full extent of the problem before proceeding.
2. Choose the Right Tarp
Not all tarps are created equal, so choose carefully. Select a heavy-duty, waterproof tarp made from durable materials like polyethylene or vinyl. These materials are resistant to tearing and can handle harsh weather conditions. Make sure the tarp is large enough to cover the damaged area fully, with at least 2-3 feet of extra material extending beyond the edges of the damage. This excess coverage will provide better protection and make it easier to secure the tarp firmly. If you’re in an area prone to high winds or storms, opt for a tarp with reinforced edges and grommets to make tying it down more effective.
3. Position the Tarp
Before heading up, make sure you have the proper equipment, including a sturdy ladder, non-slip footwear, gloves, and a safety harness if necessary. Always have someone present to assist from the ground and hold the ladder steady. Carefully climb the ladder and gently position the tarp over the damaged area, ensuring it is aligned so the edges extend well past the damaged section of the roof. The excess material will help prevent water from seeping under the sides, providing better waterproof protection. Smooth out any folds or creases in the tarp to reduce water pooling or wind catching on loose areas. Adjust the tarp until it lies flat and fully covers all exposed parts of the roof.
4. Secure the Edges with Rope or Bungee Cords
Use sturdy ropes or bungee cords to fasten the tarp to secure structural elements of the roof, such as gutters, fascia boards, or other stable points, while avoiding weak or unstable sections that could fail under pressure. Thread the ropes or bungee cords through the tarp’s grommets (metal eyelets) for a strong hold, and pull the tarp taut to eliminate any loose sections that could flap in the wind, as this can weaken its effectiveness during storms. Double-knot the ropes or securely fasten the bungee cords to ensure they stay in place, but avoid overtightening to prevent damage to the tarp or the roof’s structural elements.
5. Weigh Down the Tarp with Sandbags
For additional stability, place sandbags or other heavy objects along the corners and edges of the tarp to hold it in place without puncturing your roof. If sandbags are not available, consider using buckets filled with rocks or other weather-resistant items. Be sure to space the weights evenly to prevent the tarp from shifting during high winds, as the extra weight will keep it securely in place regardless of the weather. However, avoid placing heavy items directly on weak or damaged parts of the roof, as this could cause further harm.
6. Adjust for Proper Coverage
Once the tarp is secured, step back and inspect its placement to ensure there are no sagging areas where water could collect and cause leaks or additional damage. Proper tension is crucial for maintaining the tarp’s durability during storms. Make sure the edges direct water away from the roof and gutters, avoiding any pooling in specific areas. Adjust the ropes or weights as needed to achieve proper alignment and stability. If necessary, use additional ropes or weights to reinforce any areas that appear less secure or exposed to stronger winds.
7. Perform Regular Checks
A secured tarp isn’t a one-time solution; it requires regular inspections, especially after bad weather, to ensure it hasn’t shifted, loosened, or sustained damage. High winds, heavy rain, or debris can compromise its effectiveness over time. Check for signs of wear such as tears, fraying, or water seepage, and take action by tightening ropes, repositioning weights, or replacing the tarp if necessary. Proper maintenance will ensure the tarp continues to protect your home until permanent roof repairs can be completed, helping to prevent further damage in the meantime.
By following these expanded steps, you can effectively secure a tarp without using nails, providing a temporary but reliable solution to protect your roof and home.
💡 Tips for a Successful Installation

Proper installation is key to ensuring your tarp stays secure and provides effective protection for your roof. Following the right steps helps prevent water damage, debris buildup, and further structural issues for both commercial and residential properties.
- Prioritize Safety: Always wear protective gear like gloves and goggles to avoid injuries while working on your roof. Use a stable ladder, secure it properly, and ensure someone knows you’re working in case of emergencies. Never work alone for added safety.
- Work During Good Weather: Attempt tarp installation during calm, dry weather to reduce the risk of slips or wind interference. Avoid working during storms or extreme heat for both safety and ease of installation.
- Choose a Durable Tarp: Opt for a heavy-duty, weather-resistant tarp designed to withstand wind and rain. A high-quality tarp saves you time and money by reducing the need for frequent replacements.
- Clear Debris: Remove any sharp objects, leaves, or dirt from the roof surface before installing the tarp. This prevents damage and ensures the tarp provides a secure, leak-free barrier.
🙌 When Temporary Fixes Aren’t Enough, Trust Embry’s Roofing
At Embry’s Roofing, we understand the importance of protecting your home and ensuring the safety of your roof. Our experienced team is well-versed in providing reliable and efficient roofing solutions, including alternatives to traditional nail installation, like tarp installation. Trust is at the core of our business, and we take pride in delivering exceptional workmanship and customer service.
For your roofing needs, you can rely on us to exceed your expectations. We prioritize safety, using the right precautions and equipment to ensure a secure and stable tarp installation. Our friendly, knowledgeable team is ready to guide you through the process, answering any questions or concerns you may have.
Don’t let temporary fixes compromise the integrity of your roof. Contact Embry’s Roofing today for professional roofing services you can trust. Protect your home with confidence and experience the peace of mind that comes with working with our reliable team. Call now for a free consultation and let us be your trusted partner in keeping your roof in top condition.
CHECK OUT THE LATEST
FROM OUR BLOG