How to Install Flat Roof Flashing in 8 Steps
Flat roof flashing is a critical component of protecting commercial properties and modern buildings, making flat roofs a popular choice for their sleek design and cost-effectiveness. Proper installation is key to ensuring durability and preventing environmental damage. Flashing helps safeguard your roof by stopping water from leaking into vulnerable areas. Whether it’s pipe flashing, edge flashing, or other components, correct installation is essential for maintaining a weather-proof roof system.
Flat roof flashing offers three major benefits when installed properly:
- Prevents leaks in critical areas
- Enhances the overall weather-proof capabilities
- Extends your roof’s lifespan
While installing flat roof flashing may seem straightforward, it requires attention to detail, proper tools, and adherence to best practices. This guide will walk you through the process in 8 essential steps, helping you protect your property while ensuring your roof system is installed correctly.
🤔 Why Is Flat Roof Flashing Important?
Flat roof flashing is a crucial component in any flat roof system. Its purpose is to seal the roof’s edges, seams, and penetrations, such as pipes or vents, to prevent leaks and water damage. Flat roofs, due to their minimal slope, are more susceptible to standing water, making flashing an essential part of a weather-proof design.
The lack of proper flashing, or poorly executed installation, can lead to costly problems such as:
- Water infiltration into interior spaces.
- Structural damage caused by prolonged water exposure.
- Expensive repairs or premature roof replacement.
By investing in high-quality flashing materials and installing them correctly, you can significantly reduce these risks and increase the roof’s durability.

👉 Types of Flat Roof Flashing
Flat roof flashing is available in various types, each designed for specific areas of the roof. Here’s a quick overview of the most commonly used types of flashing:
- Pipe Flashing: This type is installed around pipes or vents to prevent water from infiltrating the roof where penetrations exist. Pipe flashing typically involves a boot or collar that seals tightly around the pipe.
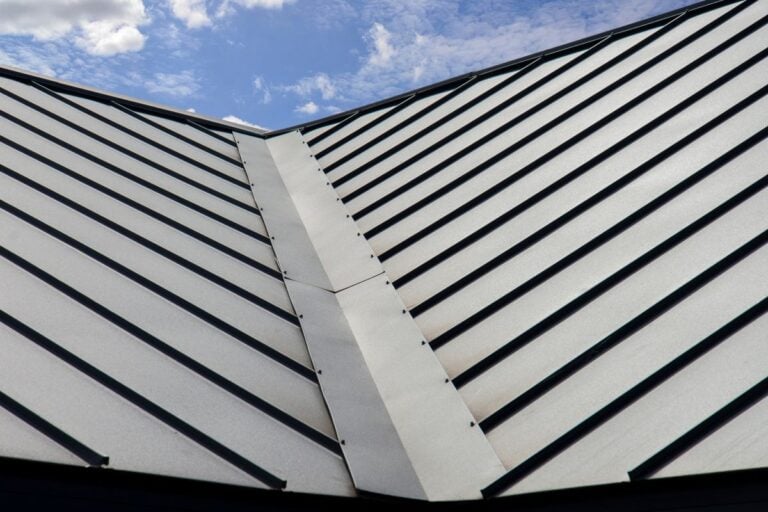
- Edge Flashing: Edge flashing secures the perimeter of the flat roof, shielding edges from water runoff and wind-driven rain.
- Skylight Flashing: If your flat roof features skylights, flashing around them prevents water from seeping into the structure, ensuring a secure seal.
- Corner Flashing: Designed to protect roof corners, this type reinforces areas prone to leaks due to improper drainage.
By understanding the different types of flashing, you’ll be better prepared to tackle installation in specific areas.
📋 8 Steps to Install Flat Roof Flashing
Proper installation of flat roof flashing involves multiple stages, each requiring precision and thoroughness. Below is a detailed guide to help you get started.
Step 1: Gather Your Tools and Materials

Before you begin the installation, ensure you have all the necessary tools and materials on hand. These typically include:
- Flashing material (aluminum, copper, or rubber, depending on the roof system).
- Roofing adhesive or sealant.
- Roofing nails and a hammer.
- Utility knife or scissors (for trimming flashing).
- Measuring tape and chalk line for accuracy.
Having everything ready will streamline the installation process and minimize interruptions.
Step 2: Inspect the Roof Surface
Carefully inspect the flat roof surface to identify potential vulnerabilities or damage that could affect the flashing installation. Ensure the surface is clean and dry, as dirt, debris, or moisture can interfere with adhesive bonding. If necessary, repair any damaged areas before proceeding.
Step 3: Measure and Cut the Flashing
Measure the roof areas where the flashing will be installed, including edges, corners, and around pipes. Use a chalk line to ensure straight cuts, then trim the flashing material to the required size using a utility knife or scissors. Cutting the flashing accurately is crucial for a tight, effective seal. Remember to consult a reliable contractor if needed.
Step 4: Apply Roofing Adhesive
Apply a roofing adhesive or sealant to the sections of the roof where the flashing will be placed. Use a trowel or caulking gun to spread the adhesive evenly, focusing on areas with seams, edges, and penetrations. This step creates a strong bond between the flashing and your roof system.
Step 5: Install Edge Flashing
Begin by installing the edge flashing around the roof’s perimeter. Secure the flashing in place using roofing nails or screws, ensuring it extends slightly beyond the roof’s edge to channel water away effectively. Press down firmly to ensure a tight seal.
Step 6: Install Pipe Flashing
Now move to areas where pipe flashing is required. Fit the flashing boot snugly around the pipe and secure it with adhesive or sealant. For added waterproofing, consider using a metal collar or clamp to create an extra layer of protection around the pipe.
Step 7: Install Flashing in 5 Simple Focus Areas
- Corners: Flashing corners can be tricky; ensure you overlap sections to provide full coverage and prevent gaps.
- Seams and Joints: Place flashing over all roof seams to eliminate potential entry points for water. Spread sealant along these seams before positioning the flashing.
- Skylights: For skylights, cut the flashing to size and secure it carefully around the skylight’s base. Proper sealing is critical to prevent water intrusion.
- Valleys or Low Spots: If your flat roof includes areas where water naturally collects, install flashing to strengthen these sections.
- Final Overlap: Overlap adjacent pieces of flashing by at least 2–3 inches to ensure a watertight seal.
Step 8: Reinforce and Inspect Your Work
After all flashing is installed, go over each section to ensure the adhesive has bonded properly and no gaps are present. Pay particular attention to high-risk areas, like roof penetrations and edges. Make any necessary adjustments or apply additional sealant where needed.
Ongoing Maintenance for Flat Roof Flashing Systems
Proper installation is only part of protecting a flat roof. Routine maintenance ensures flashing continues to perform under changing weather conditions and building movement.
Routine Flashing Inspections
Flat roof flashing should be inspected at least twice per year and after major storms. Temperature shifts and heavy rain can cause sealant fatigue or fastener movement over time.
-
Check for cracked or separated sealant
-
Inspect metal edges for lifting or warping
-
Look for rust or corrosion at penetration points
-
Ensure overlaps remain sealed and secure
Regular inspections catch small issues before they become costly repairs.
Addressing Ponding Water Early
Flat roofs are naturally more prone to ponding. If water sits near flashing or seams for extended periods, it increases leak risk.
-
Identify low spots where drainage is slow
-
Clear debris from scuppers and drains
-
Reinforce flashing near drainage points
-
Consult a contractor if water remains after 48 hours
Managing drainage protects flashing from premature failure.
When to Repair vs Replace Flashing
Not all flashing damage requires full replacement. However, knowing when repairs are insufficient can prevent larger problems.
-
Minor sealant cracks can often be resealed
-
Lifted edge flashing may require refastening
-
Severely corroded metal typically needs replacement
-
Persistent leaks signal deeper flashing failure
Proactive maintenance keeps your flat roof system secure and helps maximize long term performance.
✅ Benefits of Installing Flat Roof Flashing Correctly

Proper installation of flat roof flashing extends your roof’s lifespan, enhances its weather-proof capabilities, and prevents costly repairs. By taking the time to install it meticulously, you’re investing in the long-term health of your building. Other benefits include:
- Minimizing energy loss by securing leaks.
- Enhancing the overall aesthetic appeal of your roof system.
- Boosting the property value with a well-maintained, durable roof.
Flat Roof Flashing Considerations in Newburgh, IN
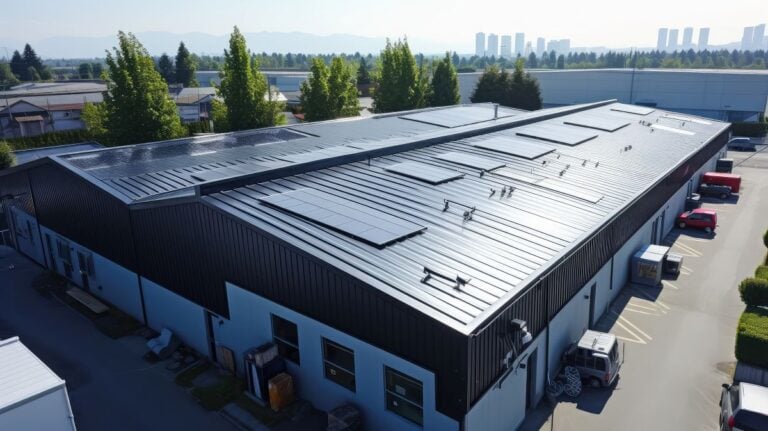
In Newburgh, IN, commercial flat roofs must withstand steady rainfall, humidity, and seasonal storms that increase the risk of water intrusion. Because flat roofs have minimal slope, properly installed flashing is essential to prevent standing water from penetrating seams, edges, and roof penetrations. Even minor installation flaws can lead to interior leaks and long term structural damage.
For commercial properties in Newburgh, well installed flashing helps:
-
Protect parapet walls and roof edges from runoff
-
Prevent ponding water from infiltrating seams
-
Reinforce vulnerable penetration areas like HVAC units
-
Extend the lifespan of the overall roofing system

We’re proud to serve business owners in Newburgh, IN, and nearby communities with commercial roofing solutions built to perform in local weather conditions.
⭐️ Trust Embry’s Roofing for Expert Roof Flashing Installation
While this guide offers detailed steps, flat roof flashing installation is best left to professionals for optimal results. At Embry’s Roofing, we take pride in delivering superior craftsmanship tailored to your commercial roofing needs.
Why choose us?
- Expertise You Can Count On: With years of experience, our team ensures every roof system is completed with the utmost precision and care.
- Quality Products: We use top-tier flashing materials and advanced techniques to protect your flat roof.
- Customer-Focused Approach: Your satisfaction is our priority. We work closely with you to understand your requirements and exceed expectations.
Don’t leave your commercial roof to chance. Contact Embry’s Roofing today to ensure your flat roof is protected for years to come!
CHECK OUT THE LATEST
FROM OUR BLOG